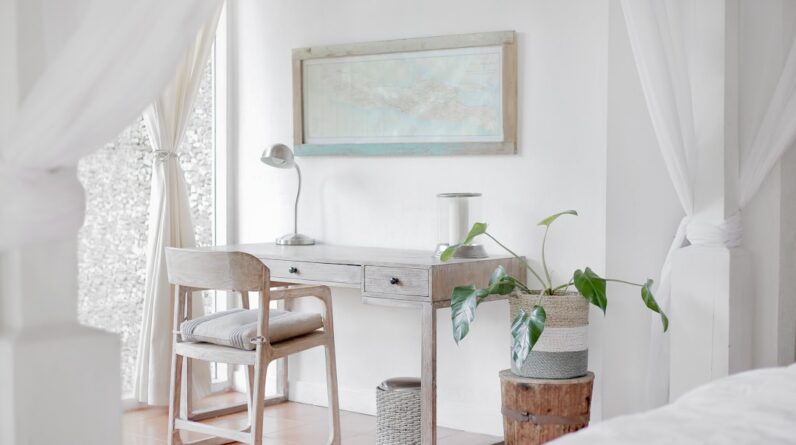
When it comes to home decor, window treatments often play a pivotal role in setting the tone of a room. However, you might find that purchasing ready-made curtains or blinds can quickly drain your budget. This is where the concept of DIY window treatments comes into play.
By taking matters into your own hands, you can create beautiful, functional window coverings that not only fit your style but also align with your financial goals. Embracing a DIY approach allows you to explore your creativity while ensuring that you stay within your budget. Creating your own window treatments can be a rewarding experience.
Not only do you save money, but you also gain a sense of accomplishment as you transform your living space. With a little planning and some basic skills, you can craft window treatments that reflect your personal taste and enhance the overall aesthetic of your home. In this article, you will discover how to assess your needs, explore budget-friendly ideas, choose the right materials, and follow step-by-step instructions to create stunning DIY window treatments that won’t break the bank.
Key Takeaways
- DIY window treatments can be budget-friendly and customizable
- Assess your window treatment needs before starting your project
- Consider using materials like fabric, wood, or even repurposed items for your DIY window treatments
- Follow step-by-step instructions to ensure a successful project
- Save money by repurposing materials and shopping for deals
Assessing your Window Treatment Needs
Before diving into the world of DIY window treatments, it’s essential to assess your specific needs. Start by considering the purpose of the window treatments in each room. Are you looking for privacy, light control, or simply a decorative touch?
Understanding the primary function will guide your design choices and help you select the right materials. For instance, if you live in a sunny area and want to block out harsh sunlight, heavier fabrics or blackout curtains may be necessary. Next, take measurements of your windows to ensure a perfect fit.
Measure the width and height of each window, accounting for any additional space needed for mounting hardware or decorative elements. This step is crucial because ill-fitting treatments can detract from the overall look of your space. Additionally, consider the style of your room.
Do you prefer a modern aesthetic or something more traditional? Your window treatments should complement the existing decor while also reflecting your personal style.
Budget-Friendly DIY Window Treatment Ideas

Once you have assessed your needs, it’s time to explore some budget-friendly DIY window treatment ideas. One popular option is fabric curtains, which can be made from inexpensive materials like cotton or linen. You can purchase fabric remnants at local craft stores or online retailers, allowing you to create custom curtains without spending a fortune.
Simply sew or use fabric glue to hem the edges and attach them to a curtain rod for an elegant finish. Another creative idea is to repurpose old items into unique window treatments. For example, you can use wooden pallets to create rustic blinds or old sheets to make simple Roman shades.
By thinking outside the box and utilizing materials you already have at home, you can save money while adding character to your space. Additionally, consider using tension rods for lightweight curtains in smaller windows or even in unconventional spaces like closets or bathrooms.
Choosing the Right Materials for DIY Window Treatments
Selecting the right materials is crucial for achieving the desired look and functionality of your DIY window treatments. When choosing fabric for curtains, consider factors such as weight, texture, and color. Lighter fabrics like sheer cotton allow natural light to filter through while providing some privacy, making them ideal for living rooms or bedrooms.
On the other hand, heavier fabrics like velvet or canvas are excellent for blocking out light and providing insulation in colder months. In addition to fabric, think about the hardware needed for installation. Curtain rods come in various styles and materials, from sleek metal to rustic wood.
Choose a rod that complements your decor and can support the weight of your chosen fabric. Don’t forget about additional accessories like tiebacks or decorative finials that can enhance the overall look of your window treatments while adding a personal touch.
Step-by-Step Instructions for DIY Window Treatments
Creating your own window treatments may seem daunting at first, but breaking it down into manageable steps can simplify the process. Start by gathering all necessary materials: fabric, curtain rods, mounting hardware, scissors, measuring tape, and sewing supplies if needed. Once you have everything ready, begin by measuring and cutting your fabric according to the dimensions of your windows.
Next, if you’re sewing curtains, hem the edges to prevent fraying and give them a polished look. If sewing isn’t your forte, fabric glue can be an excellent alternative for securing hems. After preparing the fabric, install the curtain rod according to the manufacturer’s instructions.
Finally, hang your newly created curtains and adjust them as needed for a perfect fit. This step-by-step approach not only makes the process easier but also ensures that you achieve professional-looking results.
Tips for Saving Money on DIY Window Treatments

Saving money on DIY window treatments doesn’t have to be complicated; it just requires some strategic planning and creativity. One effective way to cut costs is by shopping sales and using coupons at craft stores or online retailers. Many stores offer discounts on fabric and supplies during seasonal sales or clearance events, so keep an eye out for these opportunities.
Another tip is to consider upcycling materials you already have at home. Old sheets, tablecloths, or even shower curtains can be transformed into stylish window treatments with minimal effort. Additionally, don’t hesitate to ask friends or family if they have leftover fabric from previous projects that they would be willing to share.
By being resourceful and open-minded about materials, you can significantly reduce expenses while still achieving beautiful results.
Creative Ways to Customize DIY Window Treatments
Customization is one of the most enjoyable aspects of creating DIY window treatments. You have complete control over every detail, allowing you to infuse your personality into each piece. Consider adding embellishments such as tassels, pom-poms, or decorative trim to enhance the visual appeal of your curtains.
These small details can make a significant impact without requiring much additional effort or expense. You might also explore different styles of pleating or gathering techniques to create unique looks for your curtains. For instance, pinch pleats offer a classic touch while grommet tops provide a modern flair.
Experimenting with various styles allows you to tailor your window treatments to suit your taste and the overall theme of your home.
Final Touches and Maintenance for DIY Window Treatments
Once you’ve completed your DIY window treatments, it’s time to add those final touches that will elevate their appearance even further. Consider adding decorative hardware such as finials or brackets that match your decor style. These small details can enhance the overall look and feel of your window treatments while providing a polished finish.
Maintenance is also an essential aspect of keeping your DIY window treatments looking their best over time. Regularly dusting or vacuuming them will help prevent dirt buildup and maintain their appearance. If you’ve used washable fabrics, don’t hesitate to launder them periodically according to care instructions to keep them fresh and clean.
By taking these simple steps, you can ensure that your DIY creations remain beautiful and functional for years to come. In conclusion, creating budget-friendly DIY window treatments is not only an economical choice but also an opportunity for self-expression and creativity. By assessing your needs, exploring various ideas, choosing appropriate materials, and following step-by-step instructions, you can craft stunning window coverings that enhance your home’s aesthetic without straining your finances.
With a little ingenuity and effort, you’ll find that transforming your windows into beautiful focal points is entirely within reach.
FAQs
What are DIY window treatments?
DIY window treatments are window coverings or decorations that are made or customized by the homeowner themselves, rather than purchased pre-made from a store.
What are some examples of DIY window treatments?
Examples of DIY window treatments include homemade curtains, roman shades, valances, and decorative window films. These can be made from a variety of materials such as fabric, wood, or paper.
How can DIY window treatments be budget-friendly?
DIY window treatments can be budget-friendly because they often involve using materials that are readily available or repurposed from other items. Additionally, making the treatments yourself can save on labor costs.
What are some tips for creating budget-friendly DIY window treatments?
Some tips for creating budget-friendly DIY window treatments include using inexpensive materials such as drop cloths or sheets for curtains, repurposing old fabric or clothing, and utilizing online tutorials and resources for ideas and instructions.
Are DIY window treatments difficult to make?
The difficulty of making DIY window treatments can vary depending on the specific type of treatment and the individual’s crafting skills. Some treatments may be relatively simple to make, while others may require more advanced sewing or construction techniques.