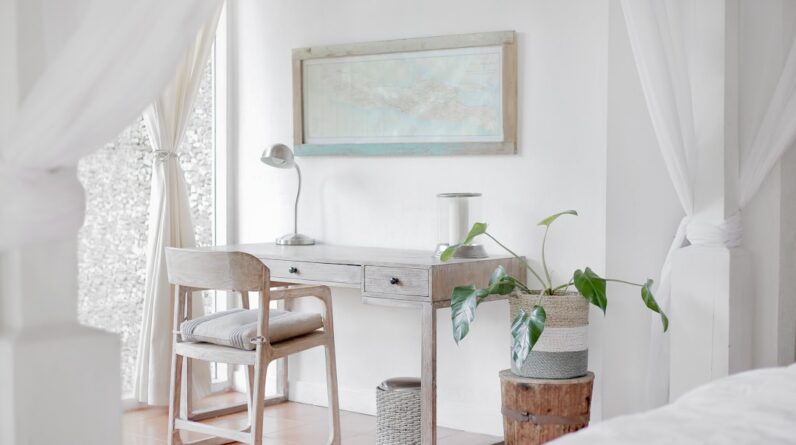
In the world of home decor, few projects are as rewarding as transforming old or plain furniture into stunning statement pieces through DIY painting techniques. You may find that painting furniture not only revitalizes your living space but also allows you to express your creativity and personal style. Whether you’re looking to breathe new life into a vintage dresser, update a tired coffee table, or create a unique piece that reflects your personality, the possibilities are endless.
With a little time, effort, and the right techniques, you can turn any piece of furniture into a work of art. As you embark on this journey, you’ll discover that DIY furniture painting is not just about slapping on a coat of paint. It involves careful planning, preparation, and execution to achieve the best results.
You’ll learn about various painting techniques, the importance of selecting the right materials, and how to maintain your newly painted furniture. This article will guide you through each step of the process, ensuring that you feel confident and inspired to tackle your next furniture painting project.
Key Takeaways
- DIY furniture painting allows for personalization and creativity in home decor.
- Choose the right paint and supplies for the furniture material and desired finish.
- Properly prepare the furniture by cleaning, sanding, and priming before painting.
- Different furniture styles may require different painting techniques such as distressing, ombre, or stenciling.
- Achieve a professional finish by using quality tools, applying thin coats, and allowing for proper drying time.
Choosing the Right Paint and Supplies
Selecting the right paint is crucial to the success of your furniture painting project. You may be surprised to learn that not all paints are created equal, especially when it comes to furniture. For instance, chalk paint has gained popularity for its matte finish and ease of use, making it an excellent choice for beginners.
It adheres well to most surfaces without extensive prep work and can create a beautiful vintage look. On the other hand, if you prefer a more durable finish, consider using acrylic or latex paint, which offers a wider range of colors and finishes while providing excellent durability. In addition to paint, you’ll need to gather some essential supplies.
High-quality brushes or foam rollers will help you achieve a smooth application, while painter’s tape will ensure clean lines and protect areas you don’t want to paint. Don’t forget about sandpaper or a sanding block for surface preparation, as well as a primer if you’re working with a particularly glossy or dark surface. By investing in the right tools and materials, you’ll set yourself up for success and make the painting process much more enjoyable.
Preparing the Furniture for Painting

Preparation is key when it comes to painting furniture. Before you dive into the fun part of applying paint, take the time to properly prepare your piece. Start by cleaning the furniture thoroughly to remove any dust, grease, or grime that may interfere with paint adhesion.
A simple mixture of warm water and mild soap can do wonders in getting rid of dirt. Once cleaned, allow the piece to dry completely before moving on to the next step. Next, assess the condition of your furniture.
If there are any imperfections such as scratches or dents, consider filling them with wood filler for a smooth finish. After that, lightly sand the surface to create a better grip for the paint. This step is especially important if you’re working with a glossy finish or previously painted surface.
Sanding not only helps with adhesion but also gives your furniture a more polished look once painted. Finally, if necessary, apply a coat of primer to ensure even color coverage and enhance durability.
Different Painting Techniques for Different Furniture Styles
When it comes to painting techniques, there’s no one-size-fits-all approach; different styles call for different methods. For instance, if you’re working on a rustic farmhouse-style piece, consider using a distressed technique that involves layering paint and then sanding down certain areas to reveal the underlying color. This method adds character and charm while giving your furniture an authentic vintage feel.
On the other hand, if your furniture leans more towards modern aesthetics, a sleek and smooth finish may be more appropriate. In this case, using a spray paint can provide an even coat without brush strokes. You might also explore techniques like ombre or color blocking for a contemporary twist.
By understanding the style of your furniture and choosing an appropriate technique, you can create a cohesive look that enhances your overall decor.
Tips for Achieving a Professional Finish
Achieving a professional-looking finish requires attention to detail and patience. One of the most important tips is to apply multiple thin coats of paint rather than one thick coat. Thin layers dry more evenly and reduce the risk of drips or uneven texture.
Allow each coat to dry completely before applying the next one; this will help you achieve that flawless finish you desire. Another key aspect is to invest time in sanding between coats. Lightly sanding with fine-grit sandpaper after each coat will help smooth out any imperfections and create an ideal surface for subsequent layers.
Additionally, consider using a topcoat or sealer once your final coat of paint has dried; this will add an extra layer of protection and enhance the durability of your painted furniture.
Adding Creative Details and Accents

Once you’ve achieved a solid base with your paint job, it’s time to let your creativity shine by adding details and accents. You might consider stenciling designs onto your furniture for a personalized touch; this can be particularly effective on tabletops or drawer fronts. Using contrasting colors can make these details pop and add visual interest.
Another option is to incorporate hardware upgrades such as new knobs or handles that complement your painted finish. This small change can dramatically alter the overall look of your piece and give it a fresh feel. You could also experiment with decoupage techniques by applying decorative paper or fabric to certain areas for added texture and personality.
The key is to think outside the box and let your imagination guide you in making your furniture truly unique.
Sealing and Protecting the Painted Furniture
After all your hard work in painting and detailing your furniture, sealing it is essential for longevity and protection against wear and tear. Depending on the type of paint you used, there are various sealants available that can provide different finishes—matte, satin, or glossy—allowing you to choose one that aligns with your vision for the piece. Applying a clear topcoat not only protects against scratches but also makes cleaning easier in the long run.
Be sure to follow the manufacturer’s instructions regarding drying times and application methods for optimal results. Once sealed, allow your furniture ample time to cure before placing it in high-traffic areas or using it regularly; this will ensure that your hard work pays off in durability.
Maintenance and Care for Painted Furniture
Once your painted furniture is complete and in use, maintaining its beauty is crucial for longevity. Regular dusting with a soft cloth will help keep surfaces clean without scratching the paint. If spills occur, be sure to wipe them up promptly with a damp cloth—avoid harsh chemicals that could damage the finish.
Additionally, consider placing coasters under drinks or using placemats on tables to prevent scratches or heat damage from hot items. If you notice any chips or scratches over time, don’t fret; minor touch-ups can be easily done with leftover paint and a small brush. By taking these simple steps in maintenance and care, you can enjoy your beautifully painted furniture for years to come.
In conclusion, DIY furniture painting is an exciting way to personalize your space while giving new life to old pieces. By choosing the right materials, preparing properly, employing various techniques, and maintaining your work, you can create stunning results that reflect your unique style and creativity. So gather your supplies and get ready to unleash your inner artist—you’re just a few brush strokes away from transforming your home!
FAQs
What are some popular DIY furniture painting techniques?
Some popular DIY furniture painting techniques include distressing, color washing, ombre, stenciling, and decoupage.
What materials are needed for DIY furniture painting?
Materials needed for DIY furniture painting include sandpaper, primer, paint, paintbrushes or rollers, and a sealer or topcoat.
How do you distress furniture for a DIY painting project?
To distress furniture for a DIY painting project, you can use sandpaper to sand down the edges and corners to create a worn, vintage look.
What is color washing in furniture painting?
Color washing is a furniture painting technique where a thinned down paint is applied to the surface and then partially wiped away to create a soft, translucent effect.
What is ombre furniture painting?
Ombre furniture painting involves blending two or more shades of paint to create a gradient effect, typically fading from dark to light or vice versa.
How can stenciling be used in DIY furniture painting?
Stenciling can be used in DIY furniture painting to add decorative patterns or designs to the surface of the furniture using a stencil and paint.
What is decoupage in the context of furniture painting?
Decoupage is a technique where paper cutouts or fabric are adhered to the furniture surface using a special glue or decoupage medium, and then sealed with a topcoat.